Welcome: Mputek (Fuzhou) Co., Ltd


sales@mputek.com
0591-83517896

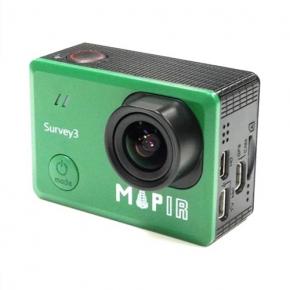
Processing Survey3 camera images
The Survey3 camera will come with default settings that we hope will work best for most clients, so there is a good chance you won't need to change them. It is not recommended to adjust any camera photo settings (shutter speed, ISO, white balance, etc.) unless you know what you are doing and have our albedo calibration target in hand. We've set defaults so you shouldn't get overexposed pixel values, but this may make the image darker than you're used to. Images that are darker than normal are suitable for processing because it reduces the chance of pixels being overexposed and losing pixel data. If you have any questions about adjusting the settings, please feel free to contact us for help, but if in doubt, please use the default settings.
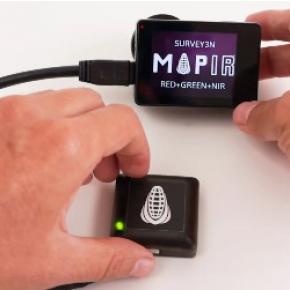
Even if you don't plan to use the included GPS receiver to geotag images, we recommend connecting it when you first get your camera. With the camera powered on and the GPS installed, walk outside with the GPS receiver facing up (opposite side from the adhesive) until you hear 6 beeps, indicating a good GPS lock on the camera. The lock will then update the time on the camera to GPS time. The GPS receiver can be removed if you are not going to use it.
The time between timer-triggered shots is the sum of the camera's interval setting plus the time required to save the images to the camera's memory card. When we say that the fastest capture time in JPG mode is 1.5s, this time includes the default 0.5s interval setting time plus about one second to save the picture. You rarely want to increase the interval unless you really want to capture fewer images. 1.5 seconds is also the average time for the timer mode to trigger, as it will vary with camera settings, SD card memory speed, and camera internal processes.
For the most reliable triggering, we strongly recommend that you use the internal timer, as using a PWM signal can create issues with missing images due to many variables within the camera. For example, the model of SD card you use and the speed at which you save images can affect how quickly the camera is ready again to take the next photo. The cards we sell are the ones we use to determine the fastest capture rates, so using a slower card (meaning any other make or model of card) may trigger slower. Triggering the camera faster than you can save the previous image will cause the camera to not be ready, so you will miss that new image. You can use the camera flight calculator at the bottom of the page here to see as quickly as possible what the camera must be triggered to provide the overlap needed for the survey. Note the "Photo Interval" line at the bottom.
The camera will by default only save images as JPG. To capture greater contrast in the image without applying any white balance, compression and gamma, we recommend changing to RAW+JPG mode. Set it to RAW+JPG mode, and the camera will save the image longer, so the time between triggers will be longer. If your stitching software requires JPG (like DroneDeploy), in our MAPIR Camera Control (MCC) app you can easily convert RAW to TIFF to JPG. The less compressed (more RAW) your images are, the easier they will be stitched, so use TIFF whenever possible.
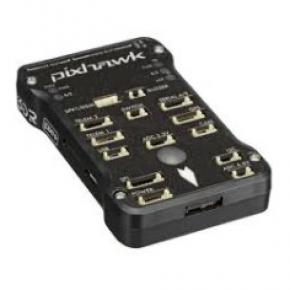
Survey mission planning is based on your air platform and the flight controller it uses. This video shows how to set up a mission using a Pixhawk-based drone and Tower, the free Android mission planning app.
After capturing images, you may need to prepare them before stitching them into a 2D orthomosaic or generating a 3D model, which is where our MAPIR Camera Control (MCC) application comes in.
If you captured the image in RAW+JPG mode, use MCC's Processing tab to convert it to TIFF. During processing, full image metadata, including GPS capture location (if using the included GPS receiver), is copied from JPG to TIFF.
Next, you'll calibrate the image using the MCC's Calibration tab (not necessary for the RGB visible model). This step will ask you to provide an image of our reflectance calibration target if you captured an image of the reflectance calibration target prior to the survey (recommended), or if you don't have one, you can use the default reflectance values we provide (based on the created from images captured in full sunlight). The image will be calibrated with each pixel representing a reflection value rather than a color value, so don't worry if the image looks too dark. If your orthomosaic software does not support TIFF (eg DroneDeploy, MapsMadeEasy, etc.), you also have the option of converting the TIFF file to JPG.
An orthomosaic is a single-stitched 2D map image consisting of many individual photographs taken during a survey.
The quality of orthomosaics and other exports will vary depending on the capabilities of the software used to create the project export. For best results, it is strongly recommended that you use processing software that can use geolocation (GPS) information contained in images. The photogrammetry engine code that combines the images may vary from software to software, so some software may perform better than others depending on the subject matter of the area being surveyed. For example, homogenous fields with closed canopy row crops are more difficult to stitch together because the images tend to look similar.
Photogrammetry programs use the Structure from Motion (SfM) method, often referred to as "point cloud" software. They are called so because they create a 3D model of points, or match pixels to generate an export. Since these programs create a point cloud, they can also output .obj, .mtl, and .jpeg modeling files for use in 3D model viewers such as Sketchfab.
Cloud-based applications such as MAPIR Cloud, Pix4D Cloud or DroneDeploy all require you to upload images to their servers and then notify you when the processing is complete. Fees for these services vary, but most start at around $100 a month. They also vary in terms of the end result you get from their services, usually the more expensive "professional" packages offer more output at a higher cost. These cloud-based services usually don't support TIFF files, so make sure to convert any RAW images to JPG before uploading.
Popular desktop software that can be used include Pix4Dmapper, Agisoft Metashape, and Simactive Correlator3D.
Contact: Sam Lan
Phone: 13358250301
E-mail: sales@mputek.com
Whatsapp:+8613358250301
Add: 4th Floor,No.43,Section C,Software Park,Fuzhou,350003
We chat